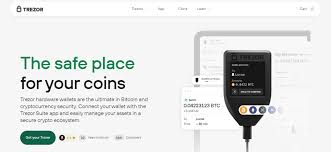
Trezor Login: A Complete Guide to Accessing Your Trezor Wallet
Trezor Login is the secure method of accessing your Trezor hardware wallet through Trezor Suite, the official application for managing cryptocurrencies. Trezor hardware wallets, including the Model One and Model T, are designed to store cryptocurrencies offline, protecting private keys from online threats. Understanding how to log in, manage accounts, and maintain security is crucial for any cryptocurrency user. This guide explains the Trezor Login process, highlights key features, and provides essential security tips.
What is Trezor Login?
Trezor Login refers to connecting your Trezor device to Trezor Suite to access and manage your cryptocurrency accounts. Trezor Suite, available on Windows, macOS, Linux, and mobile platforms, serves as the interface between your hardware wallet and your computer or smartphone.
Through Trezor Login, users can:
View cryptocurrency balances and account information.
Send and receive digital assets securely.
Manage multiple cryptocurrency accounts.
Update firmware and install supported apps on the device.
Since private keys remain on the hardware wallet, Trezor Login allows you to interact with your crypto assets securely without exposing sensitive information online.
Why Trezor Login is Important
Trezor Login is essential for cryptocurrency security because it ensures:
Offline Private Key Protection: Keys remain on the device and are never exposed to the internet.
Transaction Security: All transactions must be confirmed directly on the hardware wallet.
Portfolio Management: Access multiple accounts and cryptocurrencies in one secure platform.
Firmware and App Updates: Keep your device updated to prevent vulnerabilities and add support for new cryptocurrencies.
Following the official Trezor Login process reduces the risk of unauthorized access and phishing attacks.
Prerequisites for Trezor Login
Before logging in, make sure you have:
A Trezor hardware wallet (Model One or Model T).
The 24-word recovery seed created during wallet setup.
Trezor Suite installed on your computer or mobile device.
A USB cable for connecting the device.
Having these ready ensures a smooth and secure login experience.
Step 1: Install Trezor Suite
To access your wallet, download Trezor Suite from the official Trezor website.
Choose the version compatible with your operating system (Windows, macOS, Linux, iOS, or Android).
Follow the on-screen instructions to complete installation.
Trezor Suite is required because it provides the interface for securely managing your hardware wallet and cryptocurrency accounts.
Step 2: Connect Your Trezor Device
Once Trezor Suite is installed:
Connect your Trezor hardware wallet to your computer using the USB cable.
Open Trezor Suite, which will automatically detect the device.
Trezor Login requires physical access to the device, ensuring that all actions must be verified directly on the hardware wallet.
Step 3: Enter Your PIN
After connecting your Trezor device, enter your PIN code on the device itself.
The PIN is set during the initial setup.
It prevents unauthorized access if the device is lost or stolen.
Never share your PIN or store it digitally, as this could compromise wallet security.
Step 4: Access Your Accounts
Once the device is verified and PIN entered:
Open the “Accounts” section in Trezor Suite.
Add accounts for supported cryptocurrencies.
Monitor balances, transaction history, and portfolio performance.
Trezor Login allows you to manage multiple accounts securely while keeping private keys offline.
Step 5: Send and Receive Cryptocurrency
Trezor Login makes transactions secure and convenient:
Sending Cryptocurrency
Select the account to use.
Enter the recipient address and the amount in Trezor Suite.
Confirm the transaction on the Trezor device to authorize it.
Receiving Cryptocurrency
Generate a receiving address in Trezor Suite for the selected account.
Verify the address on the device before sharing it.
All transactions require device confirmation, ensuring that funds cannot be transferred without your authorization.
Step 6: Security Features
Trezor Login comes with multiple security measures:
Device Verification: Trezor Suite verifies that your hardware wallet is genuine.
Firmware Updates: Safely update your device to maintain security and compatibility.
App Management: Install or remove supported cryptocurrency apps on the device through Trezor Suite.
These features help maintain the integrity and security of your wallet.
Troubleshooting Trezor Login Issues
Common issues users may face during login include:
Device Not Detected: Ensure USB connection is secure and Trezor Suite is updated.
Incorrect PIN: Enter carefully; if locked out, use your recovery seed to regain access.
Software Errors: Reinstall Trezor Suite from the official website if issues persist.
Following official instructions resolves most login problems safely.
Best Practices for Trezor Login
To maintain maximum security:
Download Trezor Suite only from the official website.
Never share your 24-word recovery seed or PIN.
Confirm transaction details directly on the Trezor device.
Keep your firmware and Trezor Suite updated.
Avoid using public or shared computers for logging in.
These practices ensure your cryptocurrency remains safe and secure.
Conclusion
Trezor Login is the official and secure method for accessing your Trezor hardware wallet through Trezor Suite. It allows users to manage multiple accounts, view balances, send and receive cryptocurrencies, and update firmware safely. By following the official login procedure and using the device’s security features, users can protect their digital assets from unauthorized access. Trezor Login combines convenience with advanced security, making it essential for anyone managing cryptocurrencies with a Trezor wallet.